Category Archives: Archery for Beginners

Ask the Experts : What’s the Difference Between a ‘Recurve’ Bow and a ‘Traditional’ Bow?

So, we’ve decided to move our occasional “Ask the Expert” series away from facebook and onto our blog. Mainly because our experts (our instructors) are chronically unable to write a short answer when asked anything about archery. Be warned if you’re at the club and you start a query with, “Quick question…” it might be a quick question but it’s usually a lengthy answer!


So, this “Ask the Experts” is from Roger (well done Roger!) and gives an account of the differences between Recurve Bows (as used in the modern Olympics), Longbows (think Agincourt, Robin Hood etc), Horsebows (the short ones with leather webbing around them that you sometimes see in the club) and finally a little bit on crossbows. Please do add any other “Ask the Experts” questions in the comments below – we love talking bows and arrows!


Over to Roger :


“The difference between a modern recurve bow, a long bow and a horse bow is fundamentally one of curves and materials.


When unstrung an English (or Welsh or Scottish) long bow was – and is – a straight stave (wooden pole) with a D shaped cross section where the flat part faces away from the archer. They are typically 3” longer than the archer is tall.  When strung, the bow takes a regular uniform curve towards the archer. They were traditionally made either from using several layers of different woods laminated together, or from a single stave of wood (self-bows). Laminated bows are made using woods that favour compression on the belly of the bow (the side that faces the archer), and woods that stretch well on the back of the bow (the side that faces the target). Self-bows tend to be slower and weaker although self bows made of yew or osage orange can be stronger as it is possible to find differing qualities of compression and tensional strength in a single stave, providing the same benefits as a laminated bow. The advantage of the long bow design is that it can be made very strong and can be tensioned to very high draw weights. In some cases these bows can reach over 180lb in draw weight (usually known as war-bows) – this allowed bowyers to manufacture bows that were capable of shooting an arrow through medieval plate armour at ranges as far as fifty yards or more.


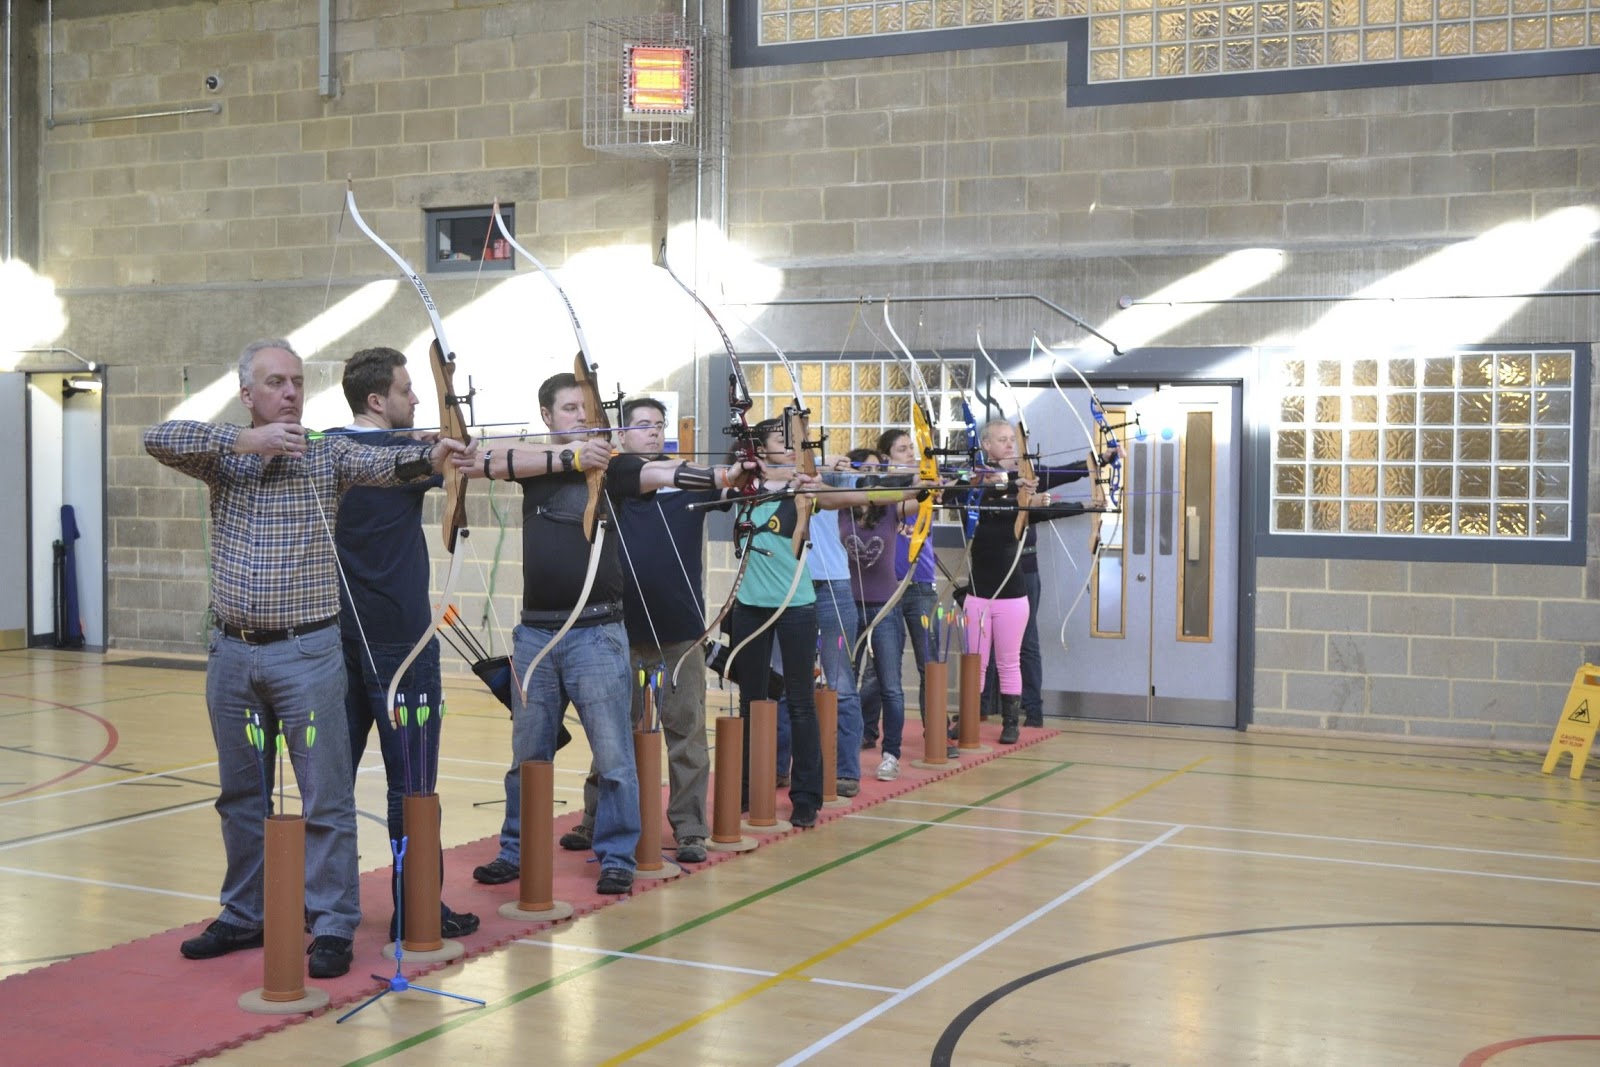
The modern recurve bow is so called because the limb-tips of the bow ‘re-curve’ back away Recurve Bow in Clubfrom the archer after the usual longbow curve. They usually have a static (unbending) riser and curved limbs. They also have a window cut into the bow to allow the arrow to take a straighter path through the bow. The window helps with accuracy as it allows the use of a stiffer arrow that can fly straighter than those released from a traditional bow where the arrow must bend itself back around the bow as its released in order to reach the target. The rationale behind the limbs “re-curving” away from the archer at the tips is so that the very ends of the limbs can be accelerated faster than the rest of the limb – this results in energy being transferred more efficiently. Ultimately this results in faster arrow speeds and improved accuracy on the target. Modern recurve bows are now typically fitted with various accessories such as artificial sights, stabilisers and vibration dampers to provide a more consistent shot.


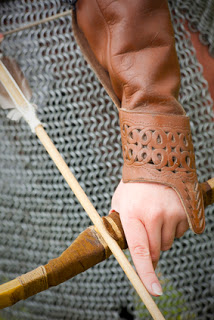
The horse bow or reflex bow is the original recurve bow. They were common in Eastern European countries, the Middle East and throughout Asia and parts of Africa in pre-gunpowder days. They are characterised by their short length and exceptionally recurved limbs. When unstrung a traditional horse bow will curve away from the archer forming a complete C shape, but in some instances are so flexible that the limb tips almost touch forming an O shape. Their short profile made them highly successful as hunting bows (as they’re more manouverable than longer bows). They were originally made of wood laminated with horn and animal sinew although today they may be made with synthetic materials which make the bow cheaper to make and easier to use.


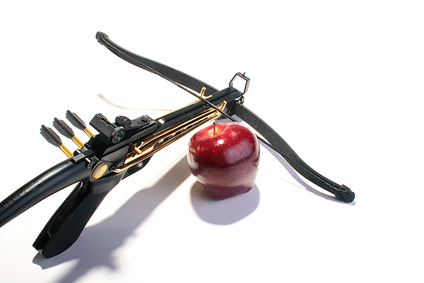
Finally, while we’re thinking about traditional bows, a crossbow can be loosely described as a Crossbowshort bow that is allowed to lie horizontally on a stock from which position it can have an arrow loaded and released using a trigger mechanism in a similar configuration to a rifle. The main advantage of a crossbow as a weapon is that once the string is drawn back it can be locked into place until the trigger is pulled. This allows the weapon to be loaded without being pointed at the target and without requiring any extra energy to be held at full draw for extended periods of time. Crossbows typically have much higher draw weights as the hold is done mechanically. Drawing or ‘cocking’ the bow can also be achieved with mechanical assistance by using a cocking aid. This means that bows over 100lb may be loaded with the aid of a winch by a single person. Cross bow limb design covers most types of bow shape and materials ranging from un-recurved basic wood through reflexed horn and sinew, to space-age material and radical modern design.”

As well as Target Archery there are many other disciplines that use both / all types of bows. You can get involved in everything from clout shooting, Archery Tag, field archery, bowfishing and the curiously named ‘Popinjay’ shoots… but what they all are will be for another post…!

As always, comments and questions are welcomed and suggestions for other “Ask the Experts” are especially useful!

Dan – Traditional Bows : a Beginner’s Guide to Wooden Longbows

I got my first traditional bow last year and I was happily hooked soon thereafter. Even if I am wielding something that is more usually found in the gloomier regions of the Amazon Rainforest in an indoor hall near London Bridge it’s still rather a lot of fun! I soon decided to look into buying something better. What followed were many weeks trawling through the internet looking at random bits of tree and talking to some spectacular beards, and as such I thought it might be worth passing on some useful little tips which I picked up. 

Modern traditional bows are an oxymoron as they are normally made up of 2 or 3 layers of wood called laminates. This is because different parts of the bow require different technical properties, specifically the ability to withstand compression or tension, and it’s impossible for one type of wood to do both equally well. Laminate bows therefore utilise woods with different types of properties in different parts of the bow which makes them better but more expensive than single piece self-bows.

Your bowyer will be able to give you detailed expert advice on the best types of wood to use and different bowyers prefer different types of wood. The following however is a good starter for 10, regardless of whether you go for an off-the-shelf bow or a more tailored one.

Bellywood. The belly of the bow is the part of the bow which is closest to the archer, and requires a wood which is capable of withstanding compression. The most common bellywood is Lemonwood which is cheap to use and found in most traditional bows. It won’t last more than a couple of years though before it starts to have a bend in it called string-follow, but it is excellent for a first traditional bow. [NB according to many bowyers, string-follow actually improves the performance of a bow, so like wine your bow will improve with age!]

Other bellywoods include Ipe, Yew, Osage Orange and Putu Jumau. Each of these is excellent under compression making them ideal for the belly of a bow, if in doubt, go for the one whose colour you like best – a traditional bow can, and indeed should, be something beautiful.

Corewood. The core or middle of the bow is the foundation of the bow and is typically made of a very hard wood, indeed the harder the better. The most common are Purpleheart or Greenheart which are excellent corewoods and, because of their availability, they are cheap.

Other corewoods include Balau [“harder than the knockers of hell” as one chap colourfully described it], Ipe, Yew, Padauk, Bubinga, Snakewood and a whole host of other woods I have never heard of – as with bellywood if in doubt go with the one whose colour you like best. 

You will note that Yew and Ipe, and indeed several others, can be used as both core and belly woods, in such a case you would end up with a bi- as opposed to a tri-laminate bow. 

Backwood. The back of the bow is the part of the bow furthest from the archer and requires a wood which is capable of withstanding tension. By far the best backwood is Bamboo, which unfortunately is also the most expensive. If you are buying a tailored bow, it is worth sacrificing cost elsewhere in the bow to be able to have a Bamboo back. Hickory or Maple are also perfectly good choices for heavy (60lb’s or more) and lighter bows respectively.

Traditional bows come in a whole host of different types, shapes and sizes from delicate flat bows to 140lb warbows, each of which however will incorporate the ideas discussed above. Go on give it a go, you won’t regret it!

Archery for Beginners

Archery is one of the fastest growing sports in the UK. Open to all, archery can be enjoyed by young and old, people with disabilities and whole families (2020 has a great junior club with Mums and Dads shooting alongside young people each weekend – www.juniorarchery.co.uk). 

As a sport that can be practiced inside or outside throughout the year, socially or competitively, archery can really be said to cater for everyone. Over here at 2020 Archery we currently have 1 completely blind club member and 1 with significant visual impairment. We’ve also had a number of wheelchair users and people with mobility issues as members in the past. 

Forms of archery

Target archery: this is the most popular form of archery in the UK and the style that is currently featured in the Olympic games (although the Olympic version is somewhat different than regular competitions). Target archery takes place on flat ground – indoor or outdoor – and involves shooting a specific number of arrows at particular sizes of target faces at 

distances of up to 100 yards. This type of archery can also take place inside over shorter distances. Indoor archery – like we do at 2020 – typically sees us shooting 5x dozen arrows at 60cm target faces for a score out of 600 at 20 yards. You can see our club members scores on the club website here (http://www.2020archery.co.uk/club-6/)


Field archery: this form of archery takes place on a series of targets set out in outside locations, often in woodland. The shooting distances are usually unmarked so archers rely on their judgement and instinct, especially if they choose to use a traditional bow such as a longbow or flatbow. Saying that, I also know a number of compound archers who also enjoy this type of more ‘natural’ shooting.  

Clout archery: this form of archery is similar to target archery but the archer must drop the arrows at a long range into a number of circular scoring zones on the ground. Arrows are shot at an angle of around 45 degrees up into the air. This type of archery probably emulates the kind of military training that used to take place when an enemy might be a known distance away (e.g. approx 150 yards) and accuracy at the specified distance could mean victory or defeat.  

Flight archery: requiring a lot of space, flight archery is a sport in which the archer must shoot the arrow as far as possible. This is generally done in very specific categories for weights and types of arrows shot from specific bows. James Farrar of Fairbow holds a number of flight records using very heavy traditional bows known as warbows – he also sells great traditional archery gear which we like a lot over at 2020 (http://www.fairbowuk.com/). 

Getting involved 

There are a number of ways that you can get involved in archery but the best place to start is your local club. Most clubs are very welcoming to beginners (as long as you’ve made an appointment or booked a session) and many offer Have-a-Go sessions. This gives newcomers the opportunity to try out the sport before enrolling in a beginners course and – hopefully – becoming a member and starting to practice with the club. 

Although clubs often welcome beginners, it is important to have a basic understanding of the sport before you try to join a club or start practicing.  Most clubs will offer structured beginners courses to set up would-be archers with the basic skills and techniques required. The course can take place across a number of weeks or over a weekend and gives new archers the opportunity to join an archery club for further training and the chance to compete in tournaments if they want to. 

Louise : my first club shoot

So, I attended and completed the beginner’s course with 2020 Archery, and by the end I felt pretty confident that I could at least do alright for a beginner. I wasn’t brilliant but I wasn’t constantly missing and I hadn’t injured anyone.

I joined the Club pretty much straight away (only £30 annually to be a member) and got my login. I had already booked my first shoot over email but I used my login to book my second shoot. It was really easy and simple to use and I worked out when the best times to book would be.

I was twinned with a club member called Sarah who was able to tell me a little about what usually happens when you attend a club practice session. After helping to set everything up we got shooting straight away. I ended up using the same bow as the last two sessions I attended which I was happy about, and due to the weather it was quite quiet and I had a target to myself.
Now, I’d love to tell you I was awesome and hit the centre of the target all the time, I’d love to tell you that because the reality was quite different! My first few ends were literally hit and miss (unless you count hitting the curtain, in which case they were all hits) and I got smacked in the arm a couple of times with the bow string (entirely my own fault). At one point, a couple of club members pointed out I was trying to shoot at a slight angle as I wasn’t directly in the line of a target. I started to get a bit tired and a bit annoyed with myself, not to mention my arm hurting from the twanging.
This is not a photo of Louise!
Luckily I was surrounded by many awesome club members, some of whom had been there a while, and some who were only in their 3rd or 4th session of shooting post-course. They reminded me that this was only my first shoot and I was probably a bit nervous and to just relax and enjoy it. So, I pulled myself together, sorted out my arm guard so it was tighter and in a more sensible place, moved along the line a bit so I was in front of the target properly and tried to relax. My first shot after all this hit red, and then the second hit yellow. The third hit outside the target but we won’t talk about that one.
I think the important thing to remember is that even though you’ve just completed the course you’re still a beginner and you’re constantly learning, altering your technique, getting used to the surroundings and just doing what you feel comfortable with.
Even though it didn’t go entirely to plan, I really enjoyed my first session, especially because I met such lovely people like Sarah, plus Tony and Laura who helped me settle in. Alright I came out with a little bruise or two and I didn’t get nearly as many points overall as I did previously, but I’m so glad I was able to do the course and so glad I’ve joined the club.
Until next time!

Louise : Final session of the beginner’s course

After the start of last week’s session it was fair to say I was quite nervous about how I’d start off this week. Would I hit the curtain again on my first shot? Would my arrow even stay inside the sports hall? 


These were all genuine worries, but my mind and body seemed to have got the hang of it. It was the last session yesterday.  I helped set up and then strung my bow. I was quite chuffed that I remembered how to do it to be honest, anything after that was a bonus. I paired up with Tim for the final time on the shooting line and we began shooting pretty much straight away. Diccon spent less time getting me to rearrange my arms or my reference point this week which I think meant that I was doing okay! My grouping wasn’t brilliant during the first few ends; it takes me a little time to get my sight lined up, but I eventually started to line up my shots. I’ve noticed that I start to hit the centre of the target, just at different points vertically! I hit mostly black and white rings during the first ¾ ends but eventually broke my streak and hit red. Fiona, a member of my group (in the photo to the left!) had a start similar to mine and then she hit the centre of the target. Another member of the group had perfect grouping on their target. It was good to see how far we’d all come since the beginning when we all thought the bow was heavy and we couldn’t get our reference point etc.


After a number of ends we had a competition. Last week in a smaller competition I came third after two ends (a score out of 60) which I was very happy with. This week our competition was out of 300 points which would be ten ends. Any mention of competition usually puts heaps on pressure on and I don’t do very well, much like in my Have-a-Go session all those months ago. This time, after so many hours and so many shots I seemed to be able to keep my composure. I wasn’t always on target (literally) and my grouping was still a little off, however I scored higher as time went on. In the end I came third again with 152 points! I even managed to get a 10 pointer at one stage.

One final tip that Diccon gave us to help with our shooting was to line up the string in the same place on the bow when the string is pulled back, using your foresight. I was terrible at this, this first time I tried the arrow hit the boss sideways and landed on the floor. I might leave using that trick until a further date!

At the end of the session everyone on the course was presented with a certificate of attendance, to show that we attended the course, spent six hours shooting and understood the basic safety protocols and would be able to join 2020Archery as a club member. Diccon gave us the information on what the next steps would be should we wish to join and everyone in my group seemed quite interested in carrying on with the sport and joining the club. One good thing about joining after the course is that you can request to have a buddy when you first attend a shoot, someone who has been shooting for a while and who can help you settle in quickly which I think is a great idea. There are a number of shooting sessions that we can book onto and equipment hire is included in the price of the session, so I don’t think I’ll be running out and buying all the kit just yet!

I had a great time on the course. Diccon was a great tutor and was very patient with us all and offered great advice and help. I found each week easier to get into shooting and forming my reference point and even the weight of the bow was less noticeable by the middle of this week’s session. I was also in a group of nice people who I hope to meet again at a club session.


So there we have it. The course is completed and now the next step is to join 2020 Archery and fulfil my dream of becoming a superhero.

Oh, and you see that photo of me there? My reference point is wrong. Don’t copy me, I’m only a beginner! Until next time……

To take a look at upcoming dates for the Monday evening course that Louise took go to the website here

Louise : Embedded reporting from Monday night Beginners Course Week 2!

I stood on the line, remembering my T position and my reference point.  I took a deep breath as I picked up my arrow and placed it on my bow. As I drew the string back I breathed in hard, then I let the string slip off my fingers and watched as the arrow sailed through the air, straight past the target on the boss and into the curtain at the end of the sports hall.

Oh…

And so the second session of the Fast-track course began!

https://www.2020archery.co.uk/lessons-courses/monday-beginners-archery-course

Those who arrived a little earlier helped to set up all the equipment and Heidi joined for a short while, giving us tips on how to place and pin the targets to the straw bosses. We started shooting fairly soon into the start of the session after a few refresher tips from Diccon, our course leader. It was fair to say that I didn’t start off well. In fact 2 out of the 3 arrows shot in the first two ends seemed to enjoy missing the boss completely. However it didn’t take long before I started to get back into the swing of things. I started to get used to tuning the sight more this time round, and from the third end, around 70% of my arrows were central on the target! Horizontally rather than vertically, but this was still good progress as far as I was concerned.

I think the most important thing I learned during this session was how to hold the bow, or rather, being reminded how to hold the bow by using my palm rather than trying to balance the bow in-between my thumb and forefinger, putting pressure on the area. I felt much more in control of the bow and my shaking reduced a fair amount too.

There was a lot of shooting practice this time, giving us the chance to work on our technique more and to get used to repeating certain manoeuvres over and over so we were more used to them. Diccon was on hand giving everyone advice and help, pointing out when a shoulder was too high or giving us new things to think about when shooting, such as where in our upper body the power would come from for a shot.

After an hour and a half, it was competition time. Each person would shoot two ends, three arrows in each, and the score would be recorded with a best out of sixty. I remember how during my Have-a-Go session I instantly became awful as soon as I felt any pressure, but I did better this time round. In the first end I scored 8-7-7 totalling 22, and then in the second I scored 9 and 6 scoring 15. The other arrow decided it was a pacifist and wanted no part in the competition. With a total of 37 I was third out of the group which I was very happy with, considering how badly I began the session!

I’m already looking forward to next week. It is quite relaxing and also a little stressful but with more shooting time and practice I think this could be something I really enjoy.

Until next time!

Pranava : What made me string a bow… (started shooting post-Olympics 2012)

I always liked stories of beginnings. I am still writing mine in many ways but here is the very beginning.
Before I walked into 2020 archery for a weekend beginners’ course, I had never seen a bow.
I am not much of a sportsperson, actually not at all. I played as a child of course, but stupid games invented in the spur of a moment and I wasn’t very good at that either. If I see something hurling at me, my instinct is to flee, even if it is as tiny as a ping pong ball. Now, I would have thought that is natural but apparently not. So I grew up disliking sports, watching or playing or in whichever way.
Last year during the Olympics, everyone was excited and struggled to lay their hands on tickets to any sport they could think of as long as it was part of the Olympics. I went too, but there’s no story there. A few friends of mine went to watch archery hoping to catch my country win a medal. My country didn’t win a medal but the sport won a fan. One of my friends suddenly became very interested in archery. He took up a weekend course and then began shooting, once every week, then twice every week, and then practically any day he could take time off. Every time I met him the conversation would invariably turn to this mysterious sport I never even thought about. A month later, I signed up for a weekend course. The very same day he bought a bow, but just two days before he left London for good. Sadly, I never saw the bow. I had to wait for a few more weeks before I saw one at the course. But since the day I did, I couldn’t miss a weekend of shooting without making up for it with an extra session somehow.
The moral of the story is that archery is not just any sport. Even if you are bad at every other sport you might just be good at this one, as I would like to think I am. So I hope it makes you think about stringing a bow for the first time. Or if you already did, what’s your story?
And – oh – now I can actually watch others sports too! I guess that’s a step forward.

Louise : Attending Beginners Course session one!


I arrived at the hall and was greeted by Roger who along with Diccon would be instructing the class.
There were 16 students in total with 8 in one group led by Roger, and 8 (including myself) with Diccon. The Sports Hall is a great venue, giving enough space to two sets of teaching as well as the shooting practice in the centre. I found myself on the right side of the court with the rest of my group. Everyone had different reasons for being there, some influenced by the Olympics and Paralympics, some who had always fancied having a go. 

The group was measured up for our bow and arrows. It turned out that I, along with another two members of the group, were right handed but with a left dominant eye. For the session we were to shoot with right handed bows but we may try out left handed bows next week to see if they felt better.

Our first session focused on shooting safety, such as when it is safe to shoot and when it safe to collect our arrows based on the number of whistle blows, how to collect your arrows from the boards, where to stand when other archers are shooting, and other general tips. We were also instructed on how to stand when shooting, paying attention to our ‘T’ shape, keeping our shoulders down but arms straight. I have to admit I have a bit of trouble keeping my shoulder down but hopefully my homework of ‘posing in the mirror’ will help me get used to the stance ready for next week’s lesson on the 18thFebruary.


The most important lesson which Diccon kept drumming into us was our reference point. The reference point along with the use of the sight on the recurve bows that we were using instructs the arrow where to hit the board, making sure the string when pulled back touches the end of our nose and the corner of our chin, keeping our fingers just under the jaw. It took a couple of rounds but soon I started to understand what he meant and how it would help with my shooting and aiming. Aside from a few random arrows that would shoot off in completely the wrong direction, many of my arrows all hit the same area of the board, so hopefully with a bit more work on my sight I should be able to move towards the centre of the board.

There were a number of other people too who were there for shooting time. I enjoyed the fact that there were a large number of 2020 Archery members who were there to practice, as you were able to watch other techniques and styles, and also see that even those who have completed the course need to practice and practice. As Diccon informed us, ‘Archery is the art of repetition’.

Bring on next week!

Josie: buying a bow

Buying a bow can seem like a daunting venture, but it really needn’t be if you follow a few simple rules.


[Please do look at comments for this post as this is a big topic with a lot of different opinions. This is Josie’s opinion and I’ve put (some of) my opinion in the comments – Heidi]

1. Know Your Budget

Obvious, perhaps, but the first key point and probably the most important. There’s little point lusting after the W&W Inno CXT if it’s way out of your price range. Don’t sell yourself short either: out of the whole setup, your limbs and riser are the thing to spend the most money on and really get right. Peripherals can be upgraded much more easily at a later date. The start-up gear will not be cheap. If you can, save up for a little while beforehand to give yourself a more generous budget. It will make a big difference in the long run.

2. Make a Kit List

Josie’s bow! 

The first purchase will be complicated and it’s easy to forget little things that may not seem important. For instance, if you’re buying a bow then you will need a stringer, an arm guard, a finger tab and bow stand. None of these require massive investment, the most basic models will do (though the finger tab perhaps not so – ask for advice on tabs and try some at the club. They need to feel right!). Make savings where you can. You don’t “need” to buy an expensive sight, clicker and long rod immediately. You can also get away without a quiver for a while; there are floor quivers at the club you can use. A bow square is a very useful thing to have (again, doesn’t have to be an expensive one). If you buy your bow at a shop they will probably fit the nock points for you. If they don’t, you’ll need one of these! Remember you’ll need nock points as well. Check that your riser comes with the necessary allen keys or you may need to invest in a set – hardware shops are often cheapest but check they include the right sizes for your bow.

3. Try Before You Buy.

This is vital. Every bow acts differently with different archers and it’s crucial to buy a bow that matches you. A well-matched bow is a seamless extension of the archer. As your first bow, anything other than a wooden bow will probably feel weird, but some will feel better than others. The right bow should feel comfortable in your hand and quite strong: if it’s too easy to draw you will grow out of it very quickly, too heavy and you won’t be able to shoot with it. Try some of the bows on the shooting line first of all (ask beforehand of course!), then it’s a good idea to visit an archery supplier. There are several archery suppliers around the UK, though none in central London. Familiarise yourself with what stock they carry and have an idea what you would like to try. Before you visit, give them a call to check they have what you want to try in stock! If they are low on stock they will likely hold something back for you. Check when would be a good time to visit – if you turn up unannounced at a busy time they may not have enough staff free to give you the time and attention you need. Put half a day aside for this: it will be time well spent – this is the first step along the archery trail so it should be sound. A good bow will make a massive difference not only to your shooting but also your confidence. It could be the difference between deciding it isn’t really for you or becoming an archery lifer. I’d advise against buying second-hand from eBay unless you’re absolutely sure what you’re getting. If something is disturbingly cheap there’s usually a reason for it!


4. Get The Right Arrows

Get properly measured for arrows and match them to your bow poundage and draw length. If you buy your bow at a shop they’ll probably go through this anyway. Non-matched arrows will not fly properly and will knock your confidence. Get good arrows but be aware you will probably need to upgrade them when you increase poundage which could be as little as 6 months down the line. It isn’t worth spending £300+ on X10 ProTours unless you really have a limitless budget! The 2020 coaches will offer advice if you’re not sure what would be best.

5. Don’t Forget The Case!

If you shoot barebow and don’t want to carry much around you can probably get away with a lightweight carry case. It’s a good place to start if your kit list is small and it won’t set you back much. If your budget is more generous and you plan to get lots of bits for your bow, have a look at what else is available. Good-quality archery backpacks are expensive so have a look on eBay in case there’s a bargain to be found. Sometimes it can be possible to use a non-archery bag, but bear in mind that these are not tailor-made for a bow so will not provide all the support (and pockets) you need. Your case offers storage, protection and portability: a full archery starter kit will cost a fair bit so show it the respect it deserves and keep it safe.

Well, I think that about covers it for now. Happy bow hunting!

Louise : Pre-beginners Course Excitement!

Hello, my name is Louise. Around a year and a half ago I went along to 2020 Archery at London Bridge for a ‘Have a Go’ session with a friend for his birthday. I had a great time and decided that I would try and join a course. Finally, after a number of months, I have signed up to join the Monday Fast-Track course at Southwark Academy (starting on Monday 11th February) with 2020 Archery! 

I’ve had a dabble at archery a few times over the years and I always wanted to pursue it further. I’ll be the first to admit that watching Disney’s Robin Hood over and over again as a child probably had something to do with that, but it was also a category in the Olympics I was fascinated with and the first thing I wanted to try at a school adventure day.


I will be blogging my experiences on the course and what a newbie like me would expect to see happen during each session. Hopefully by reading about my experiences with 2020 Archery in this blog you might be persuaded to take the leap and join a course yourself!


Until next time!